What's the big deal about a 1.4 liter Swift?
To put it simply - You cannot buy a 1400CC Suzuki Swift in India as on date so why not build one! To the best of my knowledge my Swift 1.4 is the first and maybe the only K14B Swift in India outside of Maruti Suzuki. The previous generation Suzuki Swift was launched in India in 2005 with the 1.3 liter G13BB engine, it continued to sell till 2010 with the same G13BB petrol engine but later that year Maruti Suzuki decided to put their new generation but lower capacity 1.2 liter K12M engine in it. They kept on selling this model till around mid 2011, and later in 2011 Maruti Suzuki phased this out and brought in the new generation Swift, launched internationally in 2010, with an updated K12M engine with Variable Valve Timing (VVT) for the intake camshaft.
I referred to the 1.2L engine as the K12M not the K12B which is sold in markets outside of India. To the best of my knowledge the K12M is an India only engine with an engine capacity of 1197CC, its a de-stroked version of the 1242CC K12B engine. Maruti Suzuki did this to keep the engine capacity under 1200cc for excise duty benefits.
K12M Specifications:
Cubic capacity: 1197CC
Bore x Stroke: 73mm x 71.5mm
Compression ratio: 10.0:1
Cylinders: 4
Valves: 16
Power: 87 PS@6000 RPM
Torque: 114 NM@4000RPM
K12B Specifications:
Cubic capacity: 1242CC
Bore x Stroke: 73mm x 74.2mm
Compression ratio: 11.0:1
Cylinders: 4
Valves: 16
Power: 94 PS@6000 RPM
Torque: 118 NM@4800 RPM
Suzuki Swift with the K14B engine is on sale in other markets though. Below is the engine specifications of Suzuki Swift 1.4 from Australian website. The Suzuki Ertiga we get here as the same engine specification.
K14B Specifications:
Cubic capacity: 1372CC
Bore x Stroke: 73mm x 82mm
Compression ratio: 10.0:1
Cylinders: 4
Valves: 16
Power: 95 PS@6000 RPM
Torque: 130 NM@4800 RPM
Swift 1.2 to 1.4 VVT Conversion
It was a stock Maruti Suzuki Swift with a K12M 1.2 VVT engine running a Unichip Q+ piggy back ECU which gave a small boost in torque and power which was slightly better than a bone stock 1.2 Swift. Later during its evolution I installed exhaust headers from N1 Engineering, Mumbai and revised the air intake setup with BMC OTA air box. The latest addition was Magnaflow universal muffler which helped making the car respond faster to the throttle pedal.
Power is never enough, what next? I was thinking of forced induction as the next step but one fine day i was comparing the specification of the K12B and the K14B engine and the idea of a 1.4 litre Swift sparked in my mind. I contacted JB of Spitfire Performance, Coimbatore regarding this, he supported the idea and this gave me some confidence and decided to research a bit into the feasibility of this. Into the research across parts books and shop manuals and the Internet and once we had enough details on this, we decided to do it! And so it started - collecting the parts required for the stroker engine transformation. After collecting almost all the major components it was time to visit Coimbatore.
Meanwhile I even considered getting this conversion done at Trivandrum or Cochin its closer to where I live so I can watch it being built and take the car to Spitfire for the dyno tuning session. But in the end I decided to go to Spitfire because of their technical expertise and experience in racing, rallying,engine rebuilding and tuning. They have their own rolling road too. In hindsight I should have got the conversion done locally and went there for tuning.
There was no point in delaying the rebuild further once the parts were in, so in the first of August 2013 I alongwith my friend set off to Coimbatore to hand over the car to JB. We left the car in the safe custody of JB and came back home and started the wait. I've been following up with Jb almost every other day and soon on the last week of August 2013 the car was ready to go on the rolling road! The work done included: 1) Stroker conversion, 2) Head porting--more like a clean up work, 3) Increased compression slightly 4) Improved my DIY air filter installation for aesthetics and robustness.
One thing to take note of was that bumping up the compression on this engine was not a simple head milling job since this engine runs an enclosed timing chain instead of an external belt. So the timing chain cover tolerances had to be matched with perfection since that holds the VVT mechanism among other things.
The dyno day came and again my friend and I landed at Coimbatore early that morning, we didn't have much clue as to what to expect from the engine. Just had a hunch that it will probably be good.
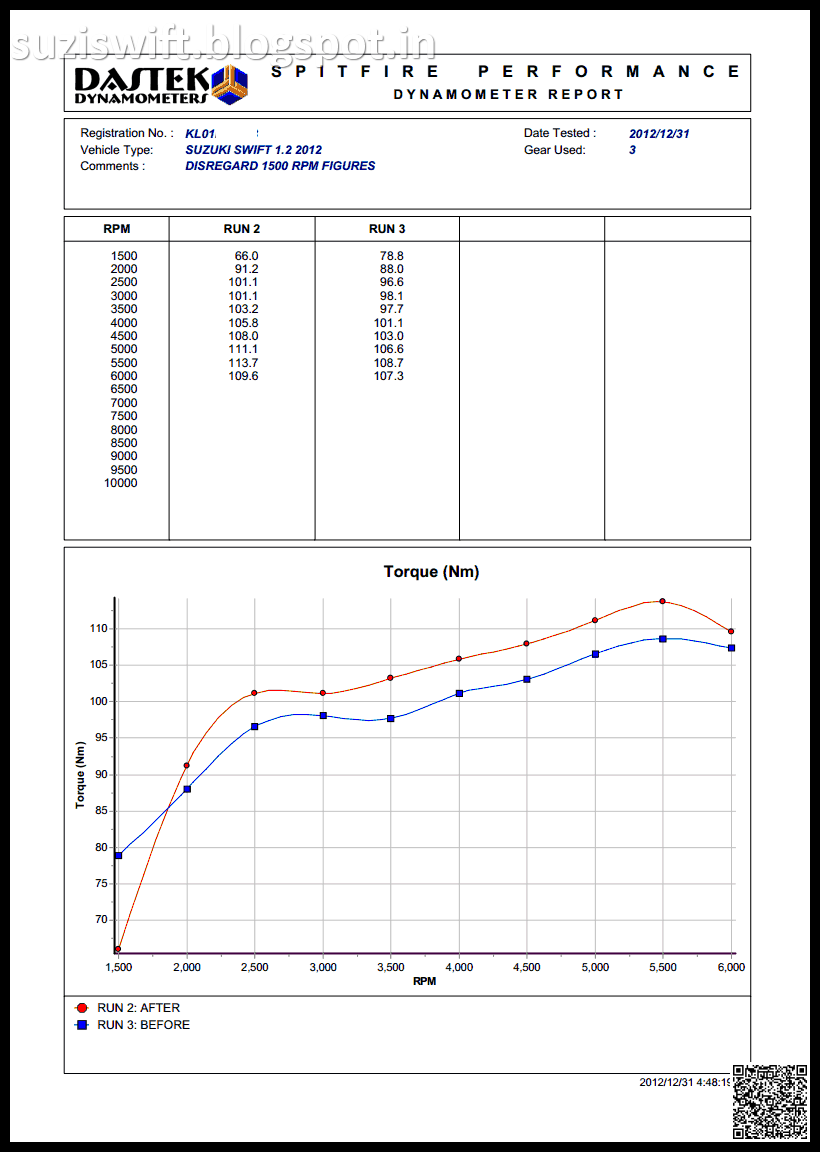
The car was put on the Dastek Dyno and JB went to work doing the tuning. After the first session it was decided that injector overdriver was to be put in to get desired AFR at a particular band. The first map gave a very very nice figure of 115BHP (at the crank), but it was decided to detune it to 109BHP to be on the safer side with this new engine. I would've liked it to be kept at 115BHP but Jb was very particular about reliability (in all of his projects, Petrols and Diesels) and didn't want to bump it up now. There is not enough documentation or case studies about tuning the Suzuki K series motor, so the engine being new and me staying 500Km away, it was decided to let go of a few horses. Not complaining because the torque figures we got is 145Nm in the detuned mode, 145Nm is no mean feat for a puny 1.4 liter NA petrol! Tuning took 4 to 5 hours and JB was on it till he was satisfied with the outcome. We got two maps stored in the Unichip, selectable using a two way toggle switch; daily drive map is good enough for 109BHP and 145Nm of torque and the high octane map is good enough for 112BHP and 149Nm of torque. This is good for now!
Driving characteristics have totally changed, there is enough torque in all the gears including 5th gear! Acceleration is really fast when comparing with stock, keeping up or overtaking faster vehicles has never been this fun in this car before! On the highway it feels like it could use a slightly taller final drive ratio which should increase the top speed, and return a bit more fuel economy while cruising.
A few things that I am proud about with regard to this conversion.
- This is my baby. I figured out this swap myself and I did the homework myself. There were no international forums to refer to all did my work except the assembling.
- No one will know what you are running inside, not even authorized service center can make it out unless they open up the engine. (I like this!)
- The engine isn't stressed and it doesn't feel stressed either.
- The engine didn't feel like it was ever opened, it was as smooth as it was before and drives like a factory-tuned high output refined engine!
Goodies
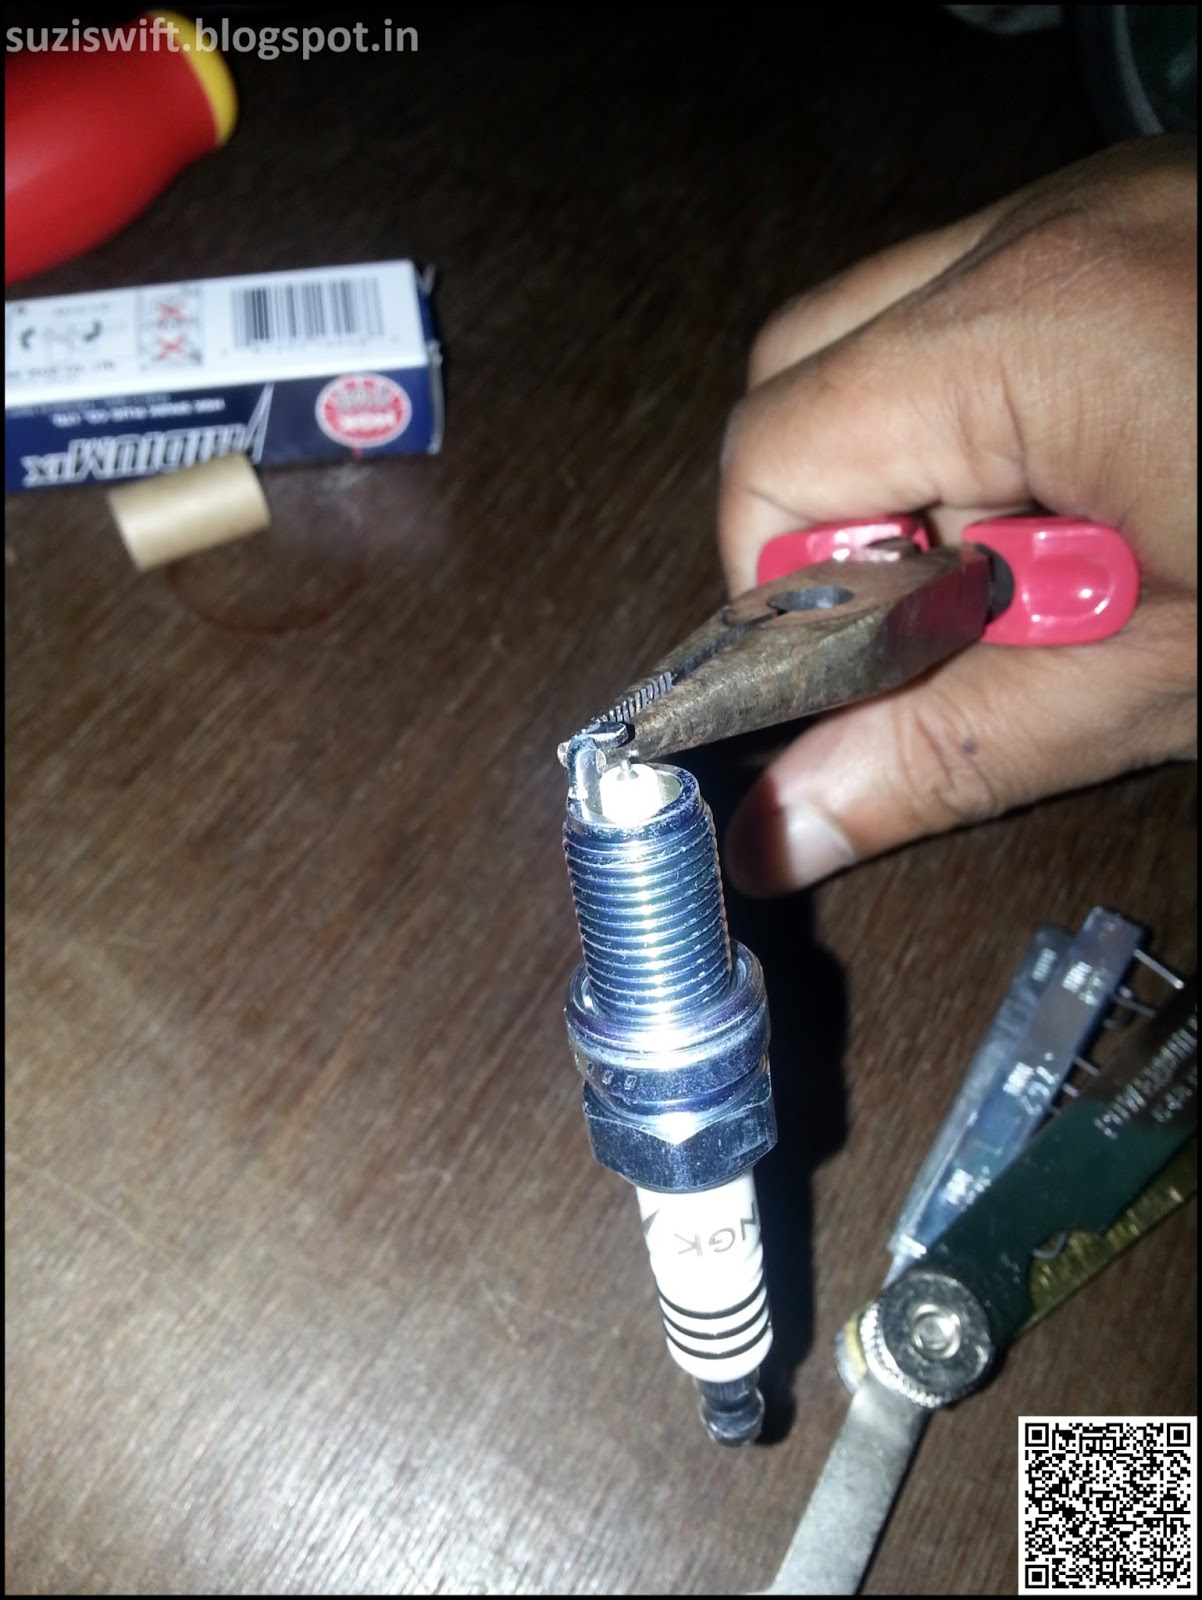
K14B crankshaft and connecting rods. These are cracked rods.
K14B Dished piston. K12M motor has flat pistons.


K14B Rings are different. Possibly due to increased piston speeds.

Pistons, Gaskets and O-rings

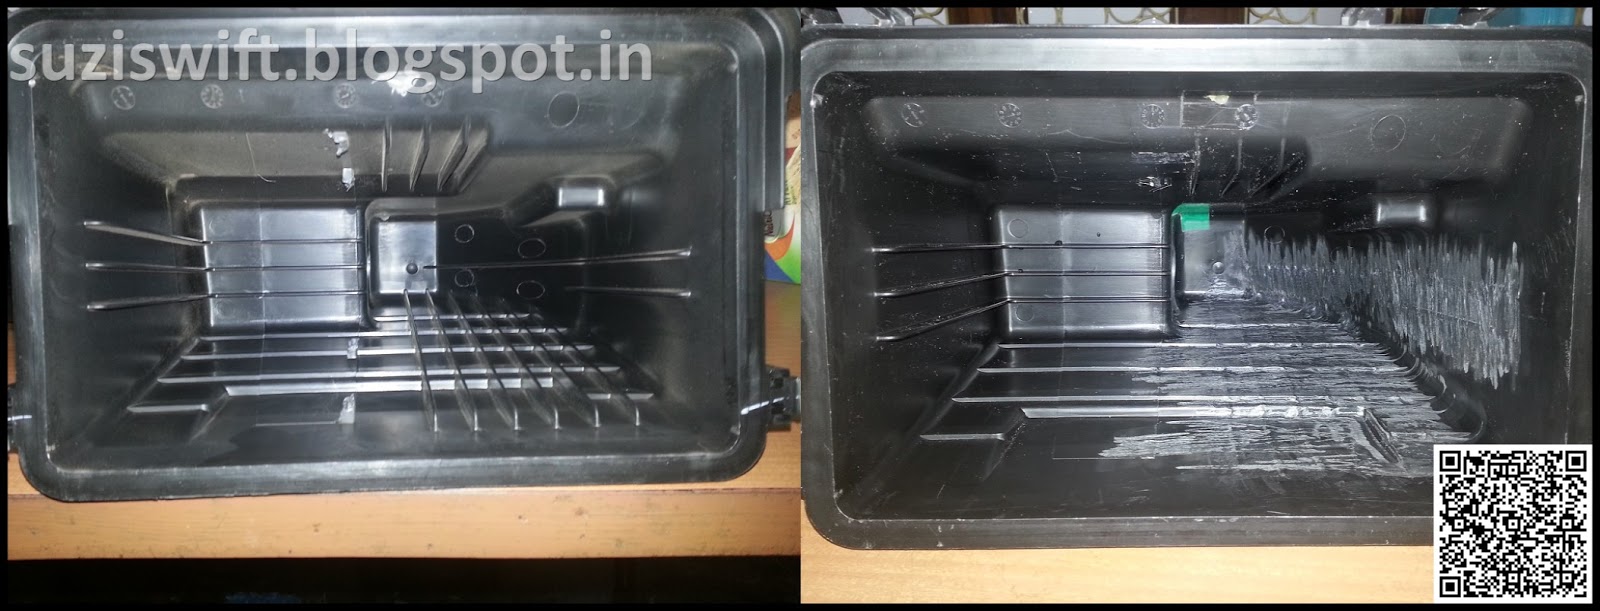
Porting before


Porting after


JB said "The ports were cleaned up to remove imperfections. There were also some mismatches in port profiles between the manifold-to-head connecting duct and the manifold itself - these were made equal. There were also some steps in the inlet ports which would have clearly caused flow disturbances. These were removed".

K14B Dished piston. K12M motor has flat pistons.

Short and Coated Skirt


K14B Rings are different. Possibly due to increased piston speeds.

Pistons, Gaskets and O-rings

Porting before


Porting after


JB said "The ports were cleaned up to remove imperfections. There were also some mismatches in port profiles between the manifold-to-head connecting duct and the manifold itself - these were made equal. There were also some steps in the inlet ports which would have clearly caused flow disturbances. These were removed".
Intake port and exhaust port


Milled head

Car on Dastek Dyno with power and torque figures


Leftovers


Milled head

Car on Dastek Dyno with power and torque figures


Leftovers
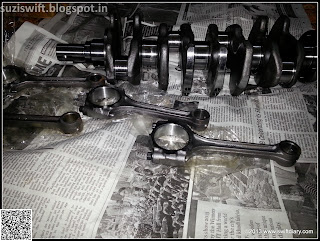
Old Crankshaft

Crank position toothed wheel

Pistons and rods. These are flat top pistons.


Update: Back home in Trivandrum and after a couple of weeks the car started misfiring and shuddering and I found that it was caused due to the injector over driver unit JB installed. I removed that and the car was back to normal, but probably running a bit lean.
--
Update: Installed an AEM AFR meter and found than even without overdriver the ratio was in the safe range so decided to remove it and not bother with correcting it again.
--

Crank position toothed wheel

Pistons and rods. These are flat top pistons.


--
Update: Back home in Trivandrum and after a couple of weeks the car started misfiring and shuddering and I found that it was caused due to the injector over driver unit JB installed. I removed that and the car was back to normal, but probably running a bit lean.
--
Update: Installed an AEM AFR meter and found than even without overdriver the ratio was in the safe range so decided to remove it and not bother with correcting it again.
--